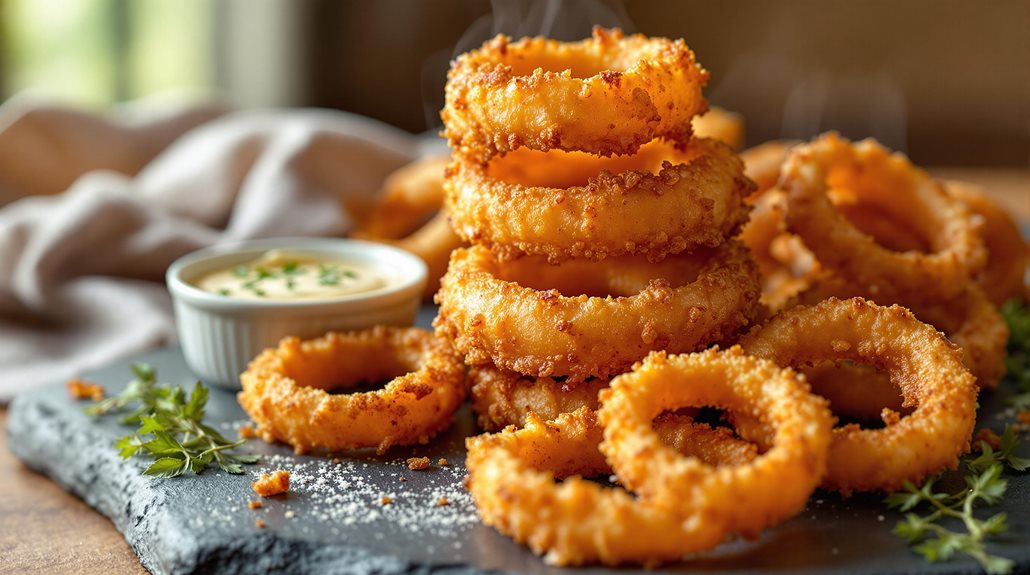
You’re about to discover the secrets behind making incredibly crispy onion rings that rival your favorite restaurant’s version.
Don’t let the thought of deep frying intimidate you. With these techniques and a few key ingredients, you’ll be serving up golden, perfectly seasoned rings in no time.
From choosing the best onions to mastering that irresistible crunch, there’s an art to creating these beloved appetizers. Let’s explore how you master this beloved side dish and impress your family and friends.
Why You’ll Love This Recipe
- Crispy Perfection: Achieve the perfect crunch with a simple batter.
- Budget-Friendly: Made with pantry staples.
- Versatile: Customize with different seasonings or dipping sauces.
- Fun to Make: A great recipe for family cooking fun!
Ingredients (Serves 4-6)
- 2 large sweet onions (I use Vidalia or Walla Walla)
- 1 ½ cups all-purpose flour
- 1 cup buttermilk
- 1 cup breadcrumbs (panko for extra crispiness)
- 1 tsp garlic powder
- ½ tsp paprika
- Salt and black pepper to taste
- Vegetable oil for frying
- Optional Add-Ons: Parmesan cheese, cayenne pepper, or smoked paprika for a spicy twist.
Step-by-Step Instructions
Step 1. Slice Onions Into Rings
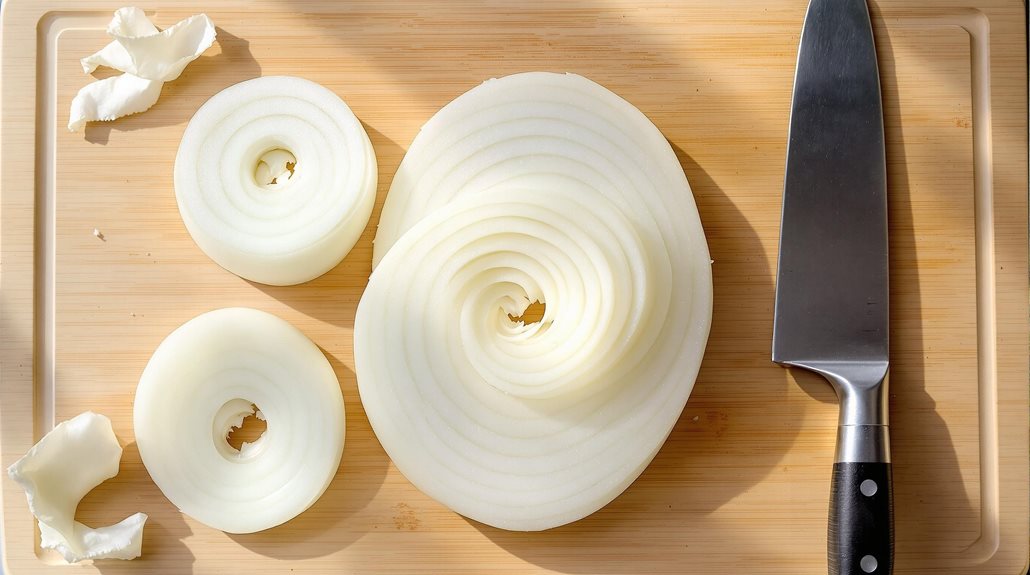
Start by peeling off the papery skin of your onions and cutting off both ends to create flat surfaces.
Place each onion on its flat end and slice it crosswise into rings about 1/2 inch thick. You’ll want uniform thickness for even cooking, so try to keep your cuts consistent.
Gently separate the rings with your fingers – they’ll naturally come apart into perfect circles.
Don’t worry if some break. You can use the smaller pieces for practice runs. For the best results, choose the largest rings from the middle of the onion since they’ll make the most impressive onion rings.
Step 2. Coat Rings With Flour Mixture
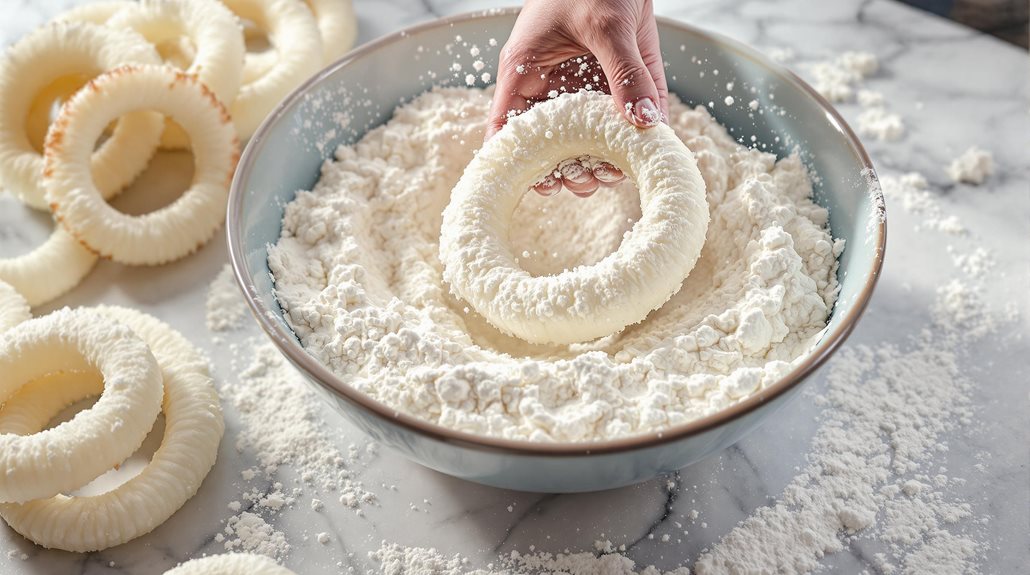
Begin by preparing a seasoned flour mixture in a shallow bowl or dish – combine all-purpose flour with salt, black pepper, and your favorite seasonings like garlic powder or paprika.
Now it’s time to coat those rings! Working in small batches, drop your sliced onions into the flour mixture. Gently toss them to make sure they’re covered completely.
You’ll need to shake off any excess flour – this helps create that perfect, crispy coating without clumping. Don’t worry if some pieces stick together. Separate them with your fingers.
The key is getting an even, light coating that’ll give you that restaurant-style crunch.
Step 3. Make and Dip Rings in Batter

Whisk together the flour, garlic powder, paprika, salt, and pepper in a large bowl. Pour in the buttermilk and whisk until smooth. The batter should be thick enough to coat the onion rings evenly.
Dipping your flour-coated onion rings into the batter is where the magic happens. Dunk each ring in the batter mixture, letting any excess drip off.
Don’t worry if it’s not perfect – a few uneven spots will create those deliciously crispy edges everyone loves.
Work with one ring at a time to prevent clumping, and use your fingers or tongs to guarantee the batter coats both sides evenly.
You’ll know you’ve got it right when the batter clings to the flour coating, creating a smooth layer that’ll fry up into that irresistible golden crust.
Step 4. Deep Fry Until Golden Brown
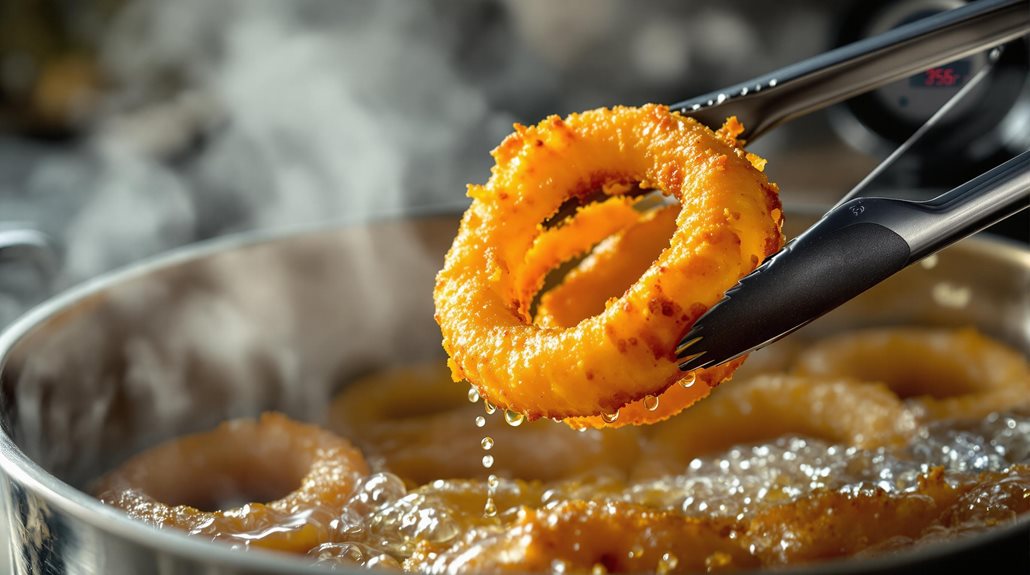
Once those rings are perfectly coated, heat your oil to 375°F (190°C) in a deep pot or fryer.
Carefully lower a few rings into the hot oil – don’t overcrowd them or they’ll stick together. Watch as they sizzle and transform into crispy golden circles.
Give them 2-3 minutes on each side, flipping once with tongs.
They’re ready when they’re evenly browned and floating at the surface. Transfer them to a paper towel-lined plate to drain excess oil and let them drain for 2-3 minutes before serving.
Keep frying in batches until you’ve got a beautiful pile of perfectly crispy onion rings.
Serving Suggestions
- Serve your onion rings with classic ketchup, ranch dressing, or a tangy sriracha mayo.
- Pair them with burgers, hot dogs, or grilled chicken for a complete meal.
- Sprinkle with grated Parmesan and fresh parsley for a gourmet touch.
Pro Tip: Double-dip the onion rings by repeating the batter and breadcrumb steps for extra crunch.
Storage and Reheating
- Refrigerate: Store leftovers in an airtight container for up to 3 days.
- Reheat: Warm in an air fryer or oven at 375°F for 5-7 minutes to restore crispiness.
- Freeze: Freeze uncooked onion rings on a baking sheet before transferring to a freezer bag. Fry directly from frozen, adding 1-2 minutes to the cooking time.
Recipe Variations
- Spicy Onion Rings: Add ½ tsp cayenne pepper to the batter.
- Cheesy Delight: Mix ¼ cup grated Parmesan into the breadcrumbs.
- Gluten-Free: Substitute gluten-free flour and breadcrumbs.
- Beer-Battered: Replace buttermilk with a light beer for a flavorful twist.
Nutritional Guide
| Nutritional Information (per serving) | |
|---|---|
| Serving Size | 6-8 rings |
| Calories | 300-400 |
| Fat | 15-20g |
| Carbohydrates | 40g |
| Protein | 4g |
Additional Nutritional Notes
Traditional deep-fried onion rings contain significant sodium (500-600mg per serving) and 2g of dietary fiber from the onions. Alternative cooking methods like air-frying or baking can reduce calories by approximately 50%. Using whole wheat flour or panko breadcrumbs increases fiber content while maintaining taste. Sodium levels can be adjusted by reducing the salt added during preparation.
Frequently Asked Questions
1. Can I bake these instead of frying?
Yes! Bake at 425°F (220°C) for 20 minutes, flipping halfway for even crispiness.
2. What oil is best for frying?
Vegetable oil or canola oil works best due to their high smoke points.
3. How do I keep onion rings crispy?
Serve immediately or keep warm in a 200°F oven on a wire rack.
How Do Onion Rings Compare to Cabbage Patties in Comfort Food Appeal?
Onion rings and crispy cabbage patties for cozy meals both serve as beloved comfort foods. While onion rings offer a savory crunch, crispy cabbage patties deliver a unique blend of flavors and textures. Both can evoke feelings of nostalgia, but the warmth of crispy cabbage patties tends to win hearts during gatherings.
Final Thoughts
Creating crispy, restaurant-worthy onion rings at home may seem challenging, but with the right technique and some practice, you’ll master this side dish.
Remember to maintain your oil temperature, work in small batches, and don’t overcrowd the pan. Once you’ve made them a few times, you’ll develop an instinct for the perfect golden-brown color and that signature crunch.
Don’t get discouraged if your first batch isn’t perfect – even professional chefs started somewhere!
Keep experimenting with seasonings and coatings until you find your signature style. Soon, you’ll be known for the best onion rings in town.